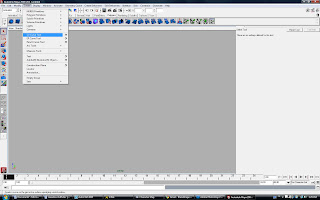
For this example, We can begin by drawing a CV Curve (control vertex curve), which can be found under Create>CV Curve Tool.
When drawing the curve, keep in mind the logic of buildings curves in a manageable way. This means that every bending moment should be composed of 3 control vertices. If there is a straight segment, we wouldn't have to click to define any points until the next bending moment. Basically, we want to get the desired shape of the curve by using as few cv's as possible, making our model easier to work with.
When we want to create blends between objects, we can do so as long as both the target and destination object have the same amount of information. For instance, the original curve I drew had 8 cv's, so the second curve which we are going to use to blend, must also have 8 cv's. This is an important step, if there is a discrepancy between the two objects, the blendshape will not work. It is best to simply copy the base geometry and manipulate it, so you can be sure that the two objects have the same 'genetic code'.
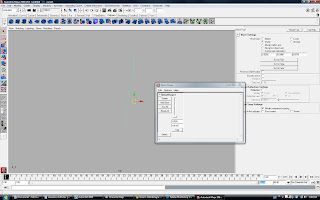
Once we have our two desired objects, while holding down 'SHIFT', first select the destination object, followed by the target object. Then navigate to Create Deformers>Blendshape, however, we will have to click on the extended parameters icon instead of just the words. (if you do not see the Create Deformers dropdown, make sure you are in the Animation subset, which can be found in the dropdown menu directly below the File menu.)
Once the dialog box opens, set the origin to 'World', and check all of the boxes for Target shape options. After doing this, click 'Create'.
If you have performed this step correctly, your destination object should disappear. The object has not really disappeared, it has simply been transfered to your blendshape editor.
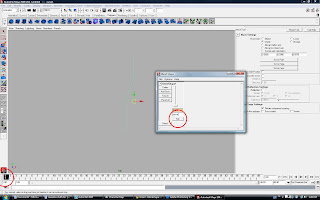
Navigate to Window>Animation Editors>Blendshape. Once the dialog opens, slide the blendshape bar to see if the geometry moves within the maya window.

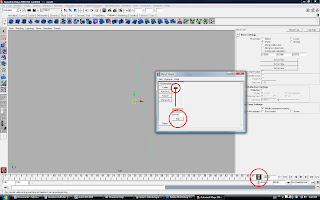
Before transferring the blendshape to your animation bar within maya, be sure to set an appropriate number of frames for the overall animation. For instance, if you know you need to generate several in-between steps, you want to set your animation frame length to a high number, such as 48 or 100. This can be done within the first text field at the end of the animation slider (seen in blue)

Slide the timeline location to the beginning of your animation, and also be sure the blendshape slider is at the bottom. Then, click 'KEY', followed by clicking on Animate>Set Key within the maya window

Slide the timeline location to the end of your animation, and also slide the blendshape slider to the top. Then, click 'KEY', followed by clicking on Animate>Set Key within the maya window. After you hit Set Key, drag your animation slider within maya to see if your geometry moves. If you can see the animation within your animation slider, you have successfully transfered the blendshape to your scene. Close the blendshape window.
With the object selected, go to Animate>Create Animation Snapshot (be sure to click on the addition parameters box to the right of the Create Animation Snapshot button)
Once the dialog box opens, match the Start and End time to the frames you have established within your scene. Where it says interval, select any number which goes evenly into the overall amount of frames of your animation. For instance, if the animation is 48 frames and i set the interval to '6', this means that every 6 frames, maya will create a copy of whatever geometry it sees on every 6th frame, so in total you will end up with 8 inbetween steps between your initial and terminal curve.
After you hit 'snapshot', you should be left with something like this.


No comments:
Post a Comment